If you are adding a new exterior door to improve your house’s aesthetics and value, having a good quality door frame is a must.
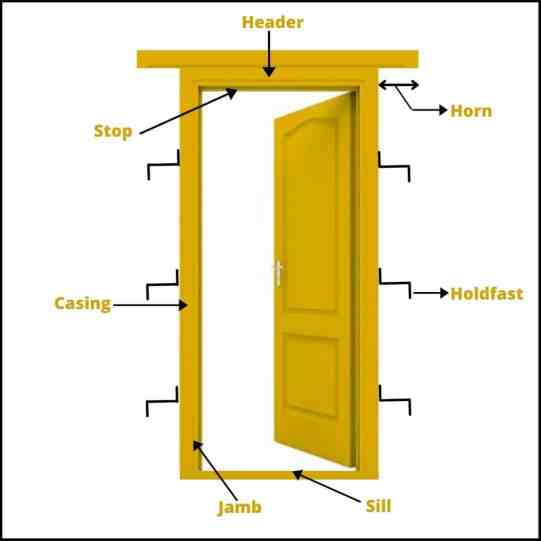
Photo courtesy: Civic Concepts
A door frame consists of an assembly of horizontal and vertical members which are placed at the top, bottom, and sides of an opening so as to form an enclosure providing support for a door. When we make an external door frame it is mostly made of soft or hardwood, but internal door frames may be of wood, metal, plastic, or even natural stones depending on the depth and thickness of the wall with many other factors.
Here are the tools that you’ll be needing when framing an exterior door.
-
Measuring tape
-
Stud finder
-
Level
-
Pencil
-
Framing square
-
Drill
-
Hammer
-
Flat pry bar
-
Hand drywall saw
-
Circular saw
-
Reciprocating saw

Photo Courtesy: Pexels
First things first…
Determine the location for a new entry door and check for obstacles in the wall. A quick look from the basement or crawlspace will often tell you what’s hidden inside the wall above. Expect the unexpected when cutting into a wall and work carefully to avoid damaging utility lines.
Water pipes or electrical cables can often be moved without a great deal of difficulty, but check with a plumber or electrician first. Drainpipes and heating or air-conditioning ducts are difficult to move; if one is in the way, you may have to relocate the doorway.
Before framing for a new door, you should also determine what sort of stairway you will need outside. By looking at an existing door’s bottom in relation to the house’s siding, you can tell how high the stairway will need to be. Consult the door manufacturer’s instructions for the correct width and height of the rough opening you will frame. The method shown here minimizes drywall work.
Let’s get started!
STEP 1: Plan the opening
Use a stud finder to determine the locations of your studs and plan the opening. Use a level to draw lines for the final rough opening and check for square, plumb, and level. Draw lines 1-1/2 inches outside these from floor to ceiling. Cut out and remove the drywall.
Tip: When picking lumber sizes, consider the door size. A 2×6 header is strong enough for a 3-foot-wide door opening. If you are cutting a larger opening (as for a patio door), install temporary supports and use larger lumber. You might choose to use an existing wall stud as a king stud, in which case you can cut the opening 1-1/2 inches inside that stud and slip a jack stud into the wall. After framing the opening the bottom plate will be cut and removed.

Photo courtesy: Pixabay
STEP 2: Cut through the studs
Use a circular saw, then a reciprocating saw, to cut through each exposed stud in two places. If you are confident of your measuring and cutting skills, you can cut the bottom of these studs to serve as the bottom of the cripples, but they must be cut straight and square.
STEP 3: Mark the stud locations
Pry away the studs and pull them off the bottom plate. For safety purposes, pound exposed nails out of the exterior wall or bend them. Then, mark the locations of king and jack studs. Studs are 1-1/2 inches thick. Check that the distance between the jack studs equals the width of the rough opening.
STEP 4: Assemble and attach your jack and king studs
Assemble a king-and-jack-stud combination. Cut the jack stud to the height of the rough opening, minus 1-1/2 inches (to allow for the thickness of the bottom plate). Cut the king stud to reach from the bottom plate to the top plate. Place the jack stud on top of the king stud and nail or screw the pieces together. Tap the king-and-jack combination into position and use a level to check that it is plumb. Place the jack stud about 1/4 inch inside the layout line (it will move over when you drive the fastener).
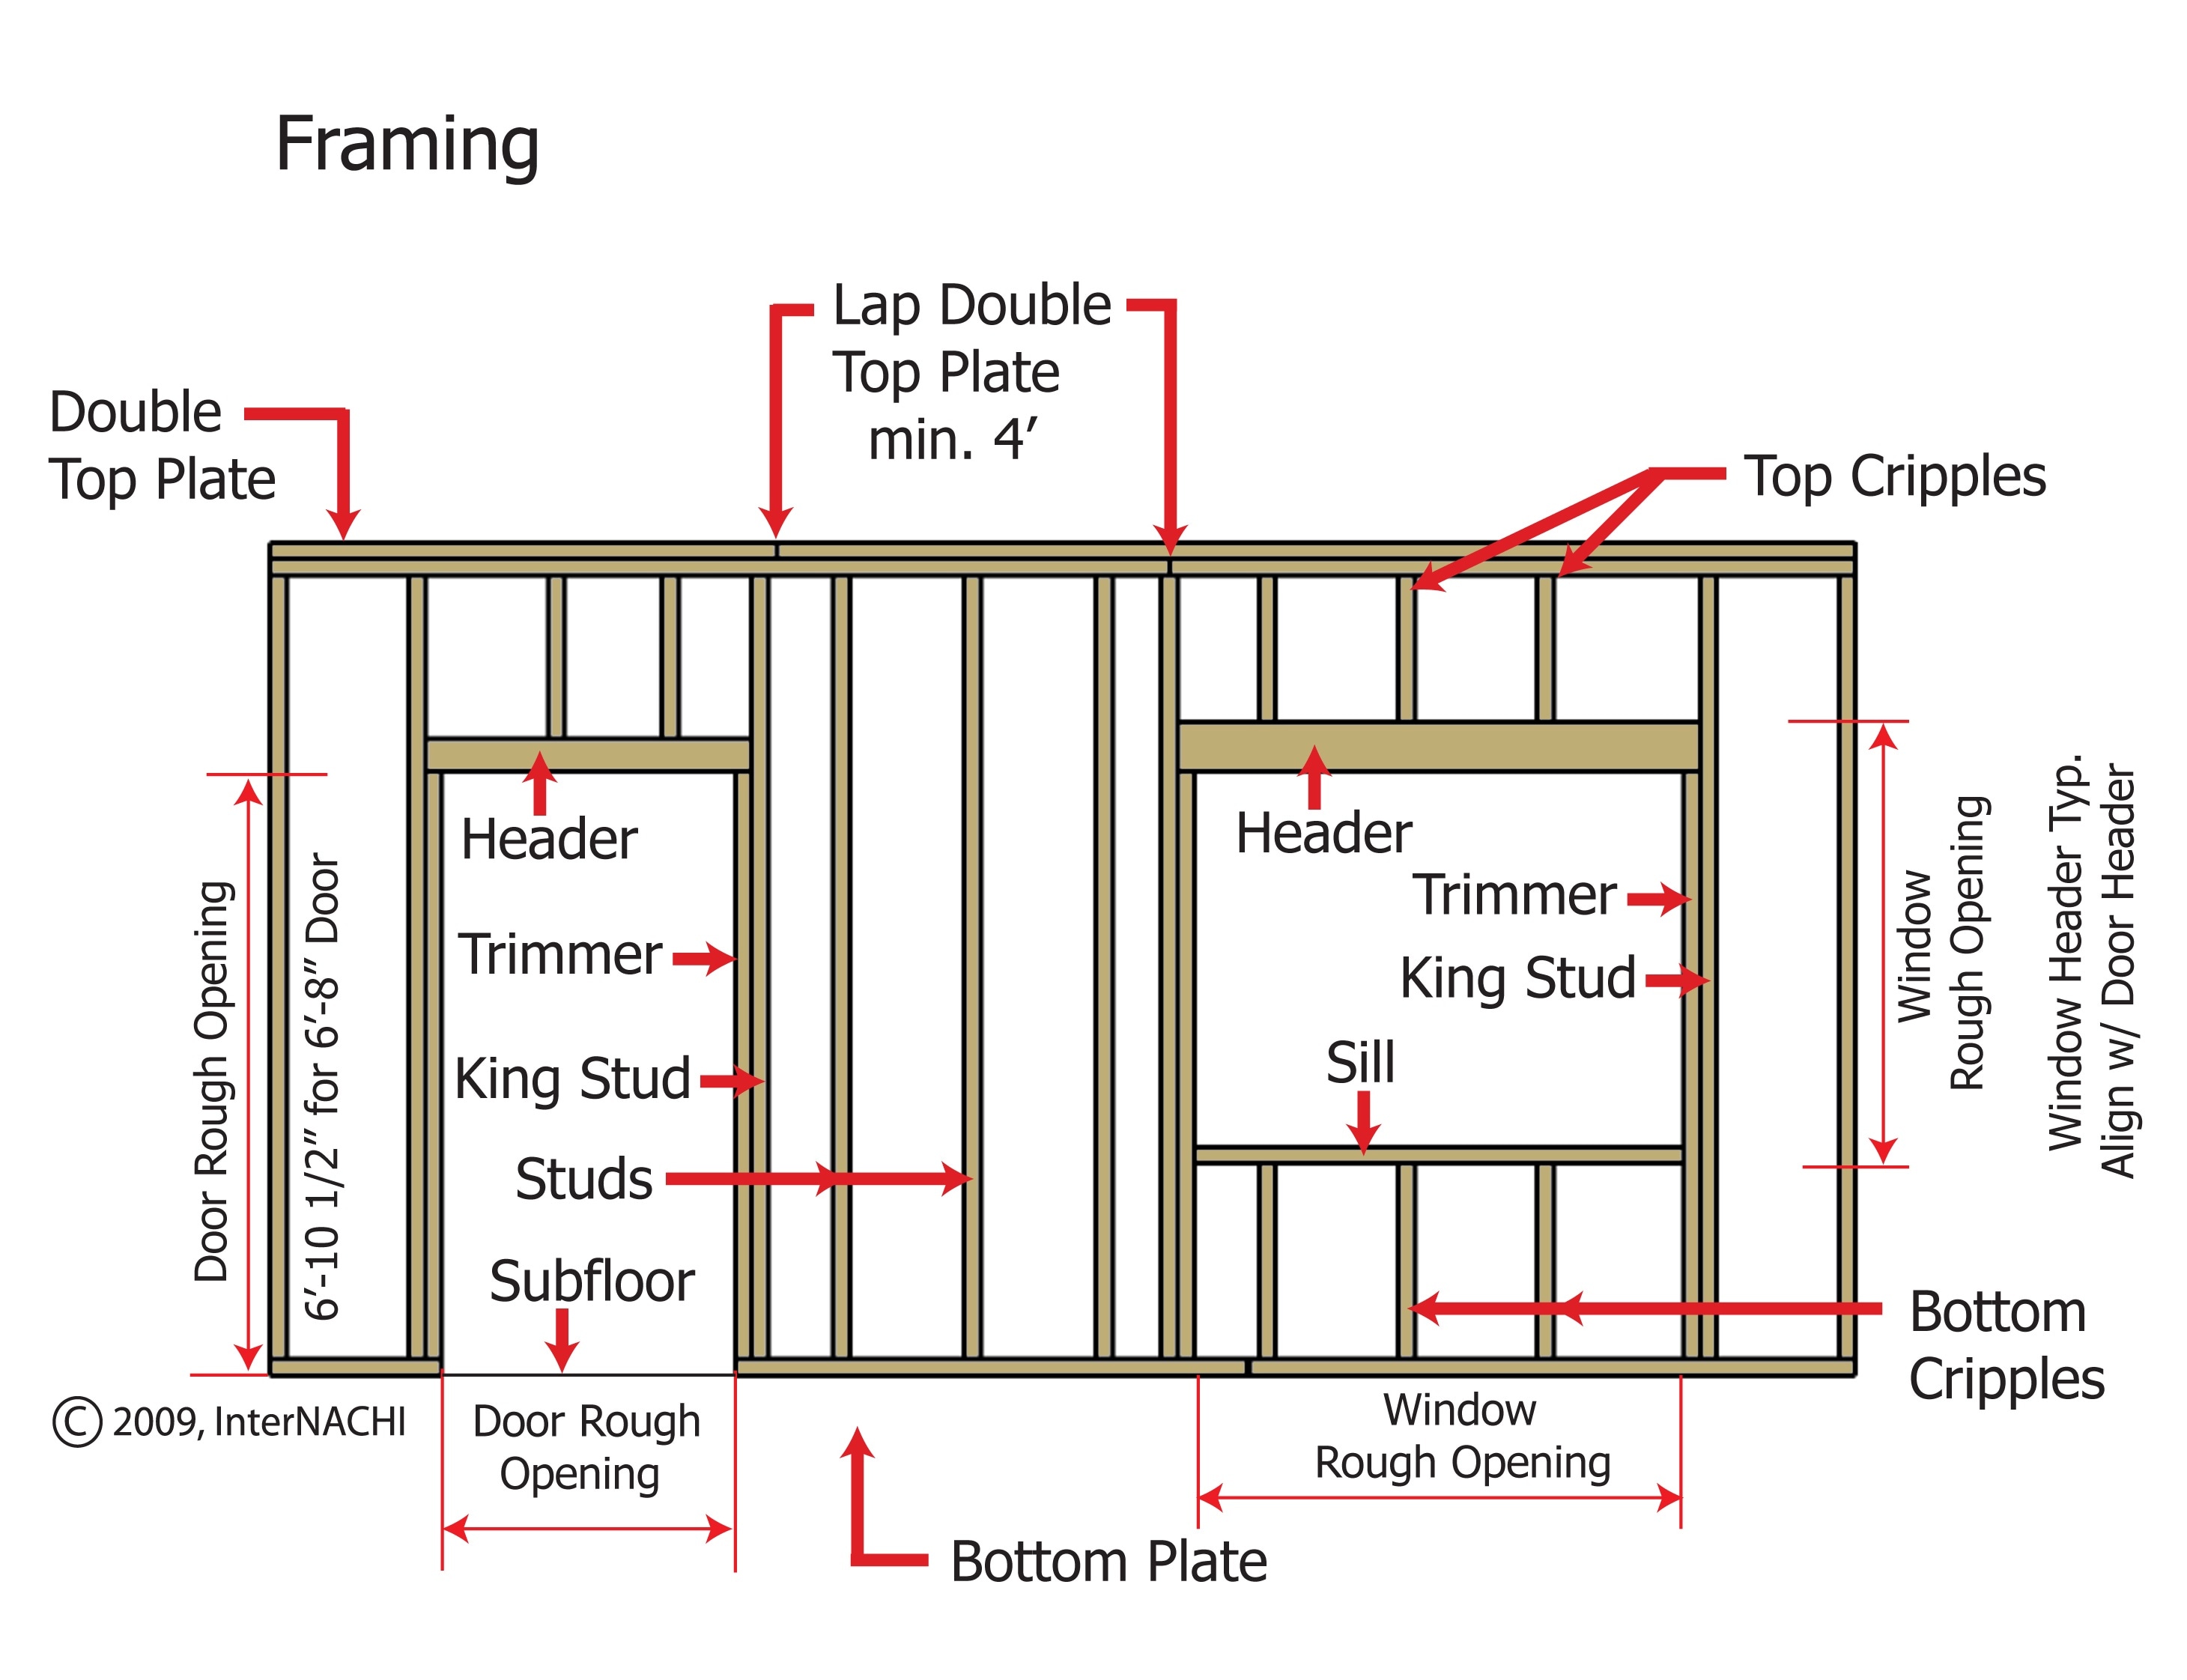
Photo courtesy: nachi.org
STEP 5: Secure studs
Angle-drive nails or screws to attach the studs to the bottom plate. Also angle-drive fasteners down through the faces of the studs. Attach them to the top plate the same way. If you will use an existing stud as a king stud, cut a jack stud and attach it to the existing stud. Carefully align the front edge of the jack stud with the front edge of the existing stud.
STEP 6: Construct header
To construct a header, cut two pieces of 2×6 (or larger) to the width of the rough opening, plus 3 inches (to allow for the thickness of the two jack studs). Cut 1/2-inch plywood spacers. Working on the floor, stack the pieces with the crowns facing the same direction (see next step) and use a square to make sure they are aligned. Fasten the pieces by driving two 3-inch screws or 16d nails every 8 inches or so.
STEP 7: Determine crown
Sight along the header to determine its crown, where it bulges upward in the middle. Place the header, crown side up, on top of the jack studs. You may need to tap the header into place.
STEP 8: Attach header
Attach the header with angle-driven screws or nails. If you have removed a wide section of the drywall, you can instead drive fasteners through the outside face of the king studs.
STEP 9: Check for square and test your new door
Check that the opening is square, level, and plumb. It need not be perfect, but it should be pretty close. If you have doubts, set the door temporarily in place to make sure it will fit. If the opening is not square, you may be able to remove fasteners at the top and move the king studs over.
STEP 10: Cut cripple studs
Cut short cripple studs to fit between the header and the top plate. Tap them in where the old studs used to be. Short pieces like this are prone to splitting, so be sure to drill pilot holes and attach with angle-driven screws or nails. Then, use a reciprocating saw to cut the bottom plate straight down to the floor. Pry the plate out.
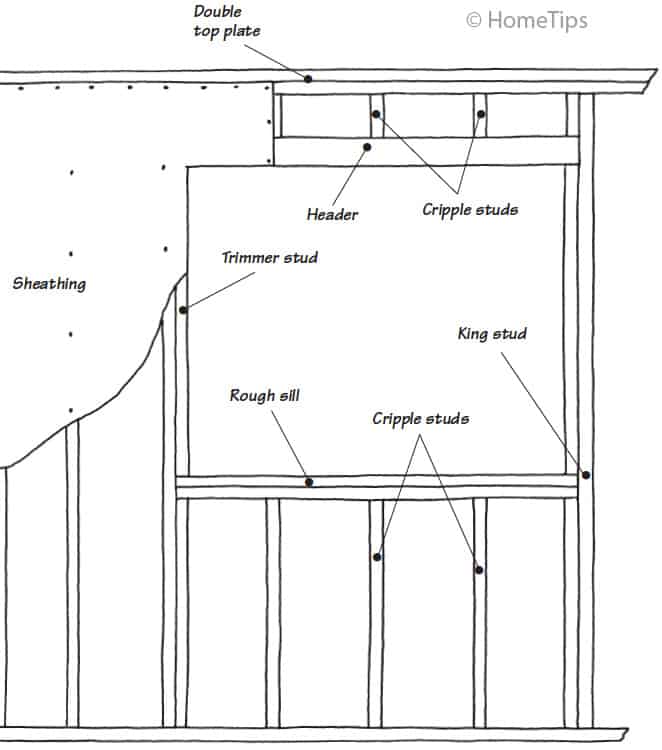
Photo courtesy: HomeTips
STEP 11: Drill through siding
Drill 1-inch holes through the siding at each corner. Slip a reciprocating saw blade into a hole and cut through the siding, using the jack studs and header as guides. If you have stucco siding, cut away the stucco first.
STEP 12: Dispose of siding
Have a helper or two catch the siding and sheathing section as it falls. Cut the section into disposable pieces and cart it away to the trash.
Are you ready to take on door framing?
![]()


 Facebook
 Instagram
 Linkedin
 Twitter
 Youtube