Concrete is the backbone of most homes, but it isn’t invincible. Seeing a tiny, spider-web crack on your pristine floor can be stressful. While a hairline crack—usually defined as being less than 3mm wide—isn’t always a sign of structural failure, leaving it alone is an invitation for trouble. Moisture, dirt, and chemicals can seep in, turning a cosmetic blemish into a costly renovation.
In this article, we will explore why these cracks appear in the first place, the specific tools you’ll need to fix them, and a simple step-by-step guide to restoring your concrete surfaces to their former glory.
Why Do Cracks Appear? Common Causes

Before reaching for the filler, it helps to understand why the concrete “complained” in the first place. Identifying the root cause allows you to determine if the issue is a simple surface fix or a sign of deeper structural movement. By diagnosing the source of the stress, you can better prevent the same cracks from reappearing after your repair.
- Drying Shrinkage: As concrete cures, water evaporates. If it evaporates too quickly, the slab shrinks and pulls apart, creating fine surface cracks.
- Thermal Expansion: Concrete expands in the heat and contracts in the cold. Without proper expansion joints, this constant “breathing” causes stress fractures.
- Subgrade Settlement: If the ground beneath the slab wasn’t compacted properly or if the soil has shifted due to heavy rain, the concrete loses its support and cracks under its own weight.
- Heavy Loads: Pushing the weight limits of a residential slab—like parking a heavy truck on a thin driveway—can cause immediate hairline fractures.
The Repair Toolkit: What You’ll Need
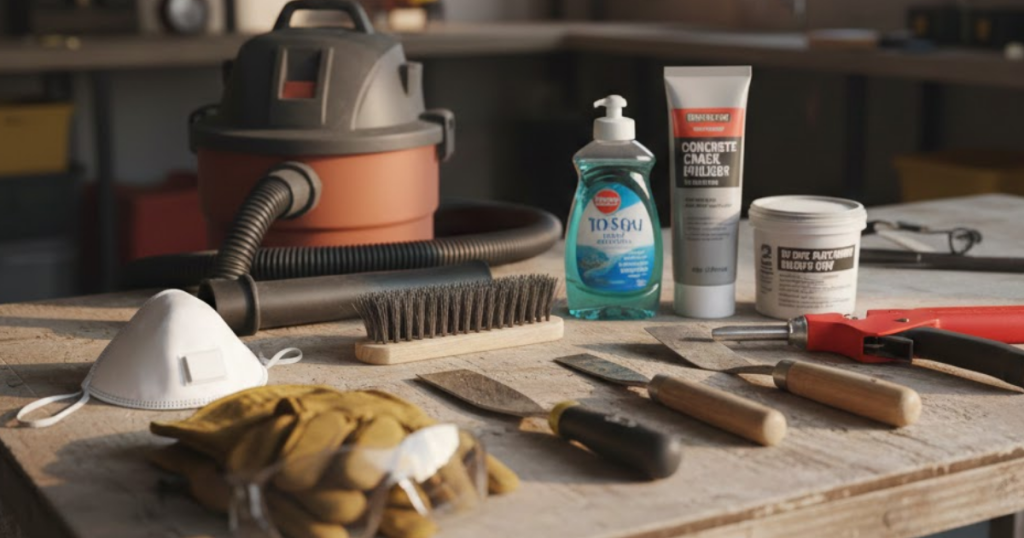
Repairing hairline cracks is a straightforward DIY task that does not require heavy machinery or specialized industrial equipment. You can easily find all the necessary supplies at your local hardware store or home improvement center. Having these basic items on hand ensures you can address surface damage quickly and effectively.
- Cleaning Tools: Stiff wire brush, vacuum or air compressor, and dish soap.
- Repair Materials: Concrete crack filler (liquid or caulk tube) or masonry epoxy.
- Application Tools: Putty knife or trowel, and a caulking gun.
- Safety Gear: Safety glasses, work gloves, and a dust mask.
Step-by-Step Repair Technique
Follow these steps to ensure a bond that lasts as long as the floor itself. Adhering to a proper sequence ensures that the patch material integrates fully with the existing slab. Taking your time with these phases will result in a professional finish that resists future wear and tear.
1. Prep and Clean
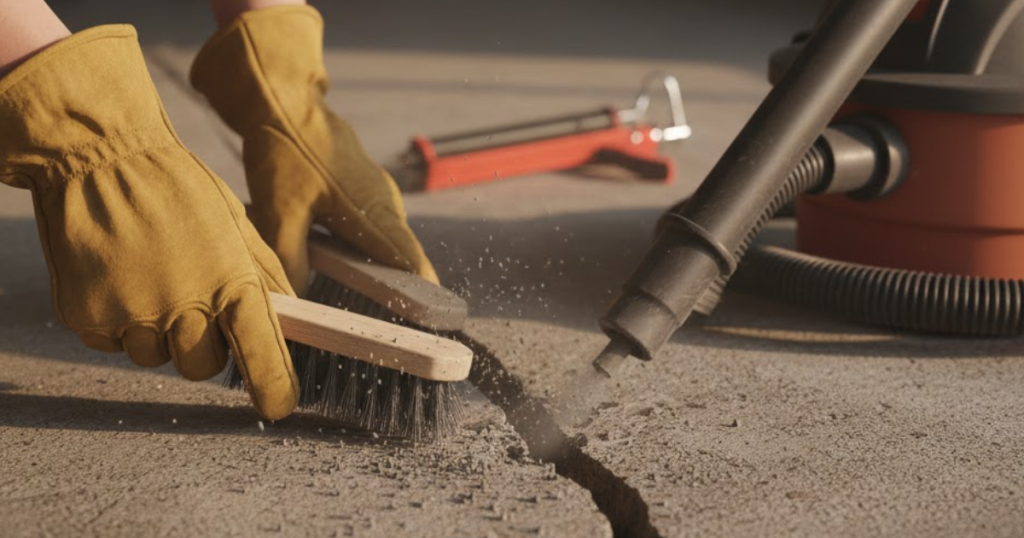
The most common reason repairs fail is poor adhesion. Use a wire brush to vigorously scrub the crack, removing loose concrete, moss, or old paint. Use a vacuum or canned air to blow out the dust from deep inside the crevice. If the area is oily, scrub it with a degreaser and let it dry completely.
2. Widen the Gap (Optional but Recommended)
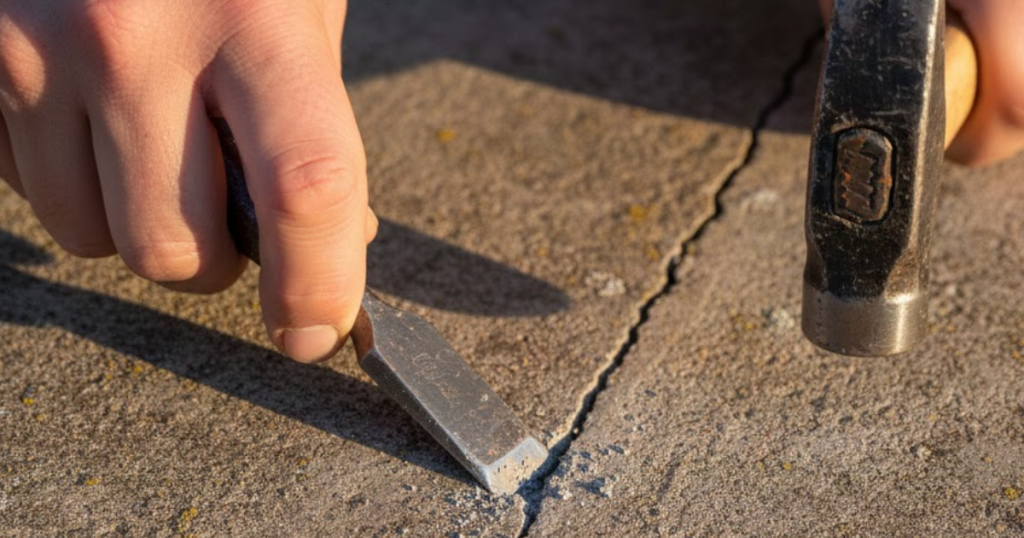
For very fine cracks, it can be hard to get the filler inside. You can use a hammer and a small masonry chisel to slightly “V” out the crack. This gives the repair material more surface area to grab onto.
3. Apply the Filler
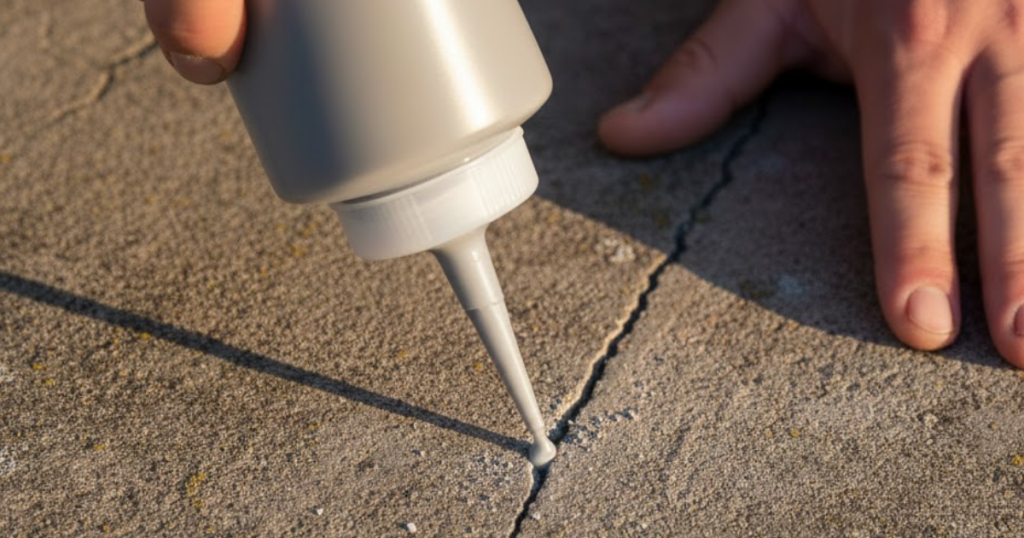
If you are using a liquid crack filler, shake the bottle well and slowly pour it into the crack. If using a caulk-style tube, cut the tip at a 45-degree angle and steady your hand. Fill the crack until it is slightly overfilled.
4. Smooth it Over
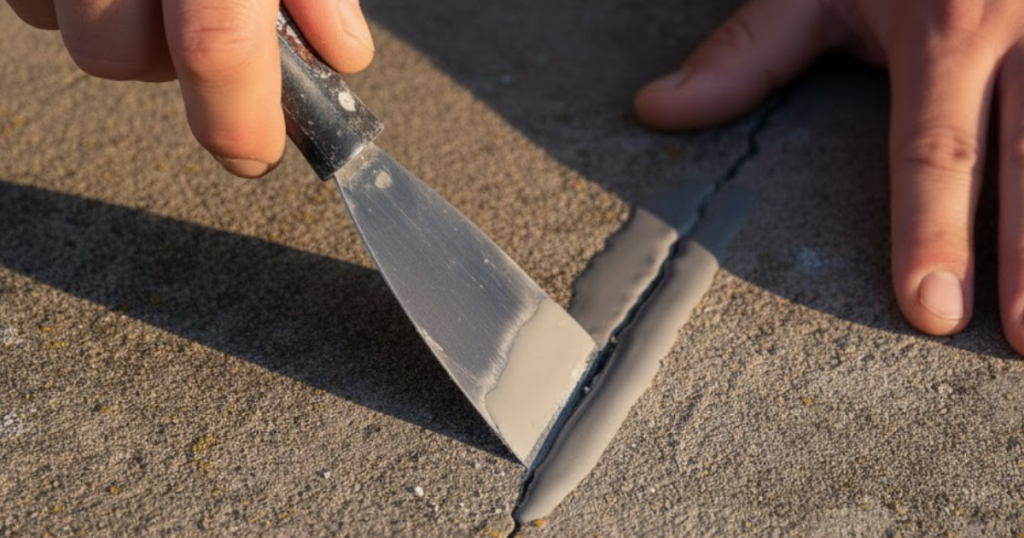
Use a putty knife or a trowel to scrape away the excess material, leveling it with the rest of the floor. Try to do this in one smooth motion to avoid “feathering” the edges too much.
5. Cure Time
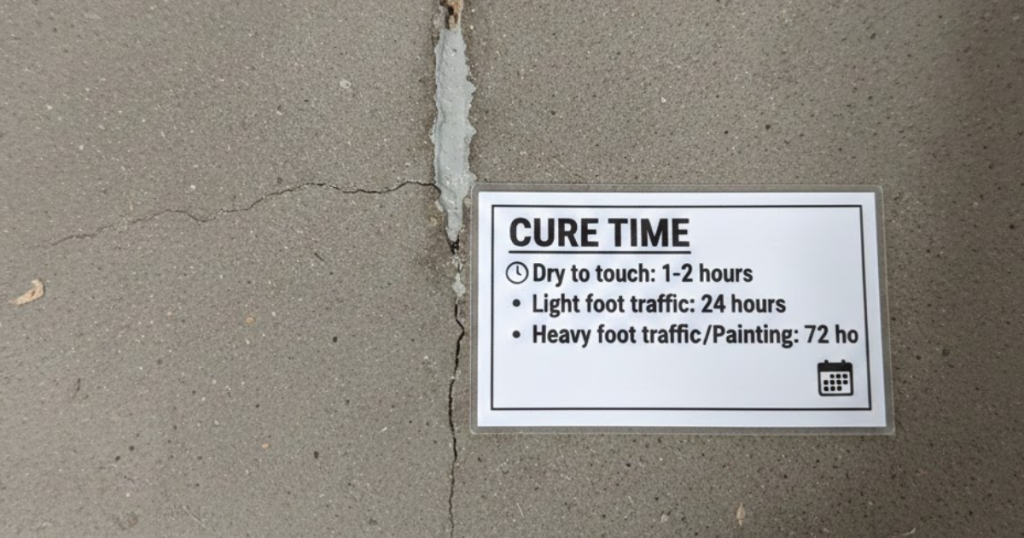
Check the manufacturer’s instructions. Most hairline fillers are “dry to the touch” in a few hours but require 24 to 72 hours before they can handle heavy foot traffic or be painted over.
Pro-Tips to Prevent Future Cracking
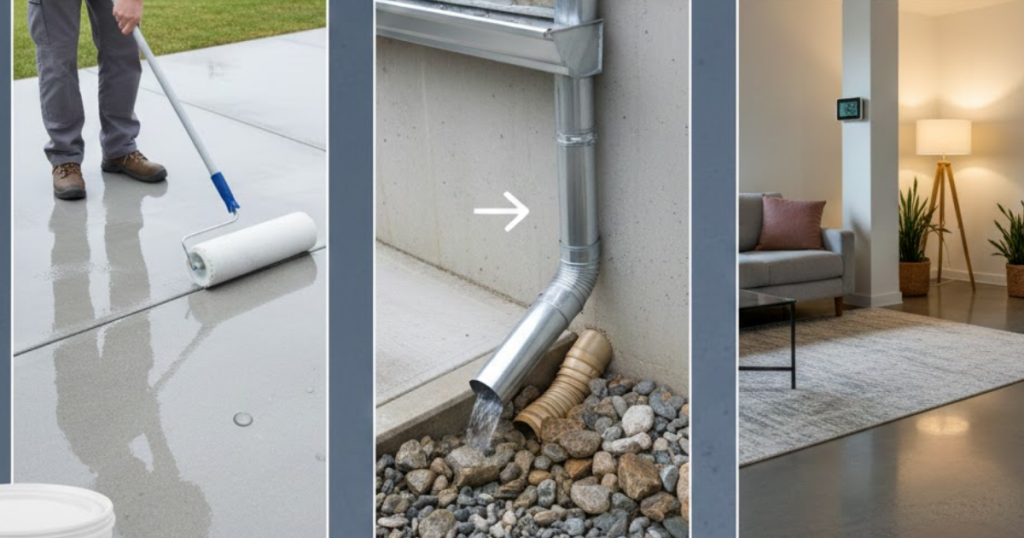
- Seal the Surface: Apply a high-quality concrete sealer every 2–3 years to keep moisture from penetrating the pores.
- Manage Water Drainage: Ensure your gutters and downspouts direct water away from your concrete slabs to prevent soil erosion underneath.
- Maintain Stable Temperature: While you can’t control the weather, keeping indoor concrete floors in a climate-controlled environment reduces thermal stress.
Repairing hairline cracks is a classic example of “a stitch in time saves nine.” By tackling these minor issues now with the right tools and a little patience, you protect the integrity of your home and save yourself from the headache of major structural repairs down the road. Keep your floors smooth, stay vigilant, and don’t let those tiny lines become big problems!


 Facebook
  Instagram
  Linkedin
  Twitter
  Youtube