Metal furring is the term for the strips of metal that serve as a sturdy basis for other materials. They are frequently concealed behind walls or ceilings. Because you can’t simply adhere drywall to the base of your roof, you’ll need a substance to attach it to. Furring is used in this situation. Furring also refers to how the furring strips are installed. Furring is used on walls as well as ceilings, mainly to smooth out the surface or hide defects. If a wall is built of rough concrete, for example, furring can be installed to allow you to attach wood or other materials to make it appear prettier. Metal furring is widely used by builders to support one layer of material over another or to retain insulation or other building products between layers of material.
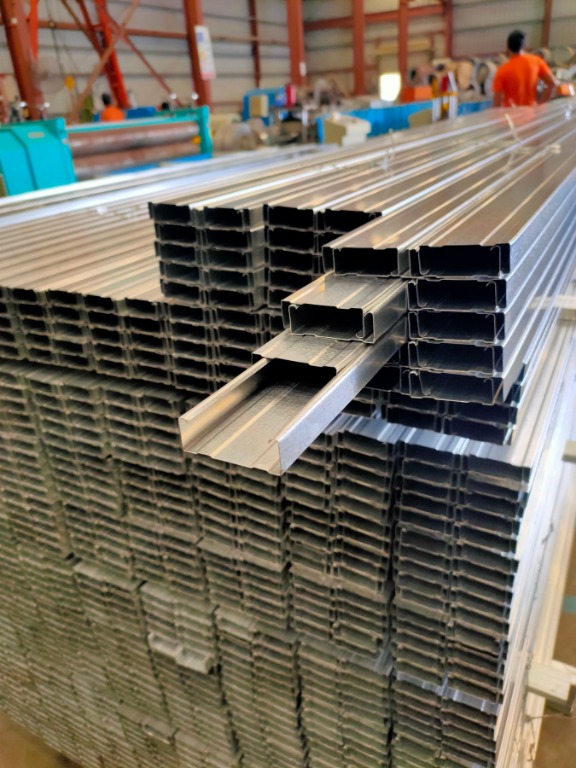
Photo Courtesy: Carousell
Metal furring ceiling is an important construction design that allows you to bind one material to another, whether you’re putting up drywall on concrete or metal tiles on a plaster ceiling. The following is a step-by-step instruction to installing furring strips for metal ceilings:
A metal furring system is created when metal furring is precisely entwined and forms a net or framework. This structure is when things are attached on both ends, with one end usually being the side to stick on and the other end being a finishing substance. When a structure is finished, the furring is normally sandwiched and hidden.
Installing a metal furring system isn’t difficult if you have the proper expertise to back up what you’re about to do. Of course, it would require some talent, but it isn’t that far removed from learning to bake bread, light a fire, or even ride a bicycle. Consider it a basic life skill that can be added to a person’s repertoire of unique knowledge and abilities. So, here’s a quick tutorial on how to install a working metal furring system.
Putting A Metal Furring System In Place
So, after deciding on the ideal ceiling material and type of tile to be supported up there, it’s time to find out how to use furring strips to connect everything and create a very clean and attractive ceiling. Take a look at the steps below!
Make sure your furring strips are ready.
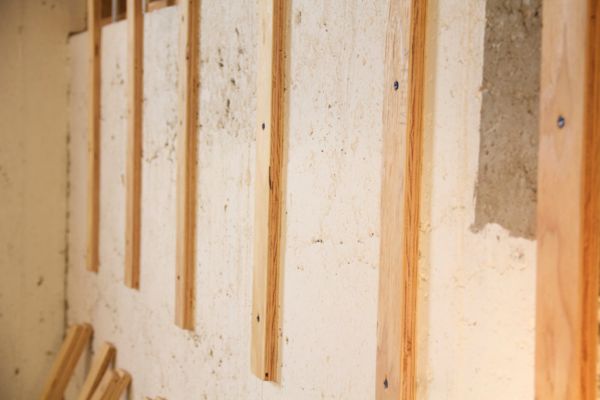
Photo Courtesy: A Concord Carpenter
Metal furrings are long and slender, and they may be cut to any size you choose. Metal furring sizes are available in a variety of styles and shapes. One of the most prevalent is hat-shaped. Consider it a staple wire with its ends protruding into the environment. Another variant resembles the letter Z in shape. Attachments such as nails or screws can be inserted more easily because of the shapes. The breadth of the furring will be determined by the joist size.
Double-check everything and take many measurements.

Photo Courtesy: Hippopx
Metal furring price may vary. However, when it comes to this type of labor, there is no room for error in furring regardless of price. Not only will the work be permanent, but it will also be quite costly to replace if something goes wrong. It’s a commitment that requires your whole attention and your whole heart, so double-check what’s going to happen. To begin, double-check, if not triple-check, the measurements of the metal furrings before beginning to assemble them. If the furrings you’ve bought are extra-long and the measurements aren’t precise, cut them a little longer than you think you’ll need. It’s preferable to overshoot and trim as needed than to be too short and extend.
Determine the location of all ceiling joists, mark them, and keep track of them.
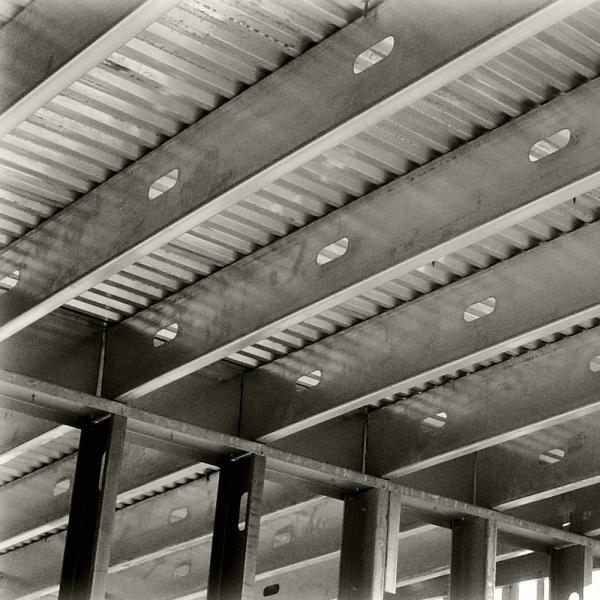
Photo Courtesy: Clark Dietrich
The roof is held together and in shape by joists. It’s a kind of foundation, similar to how walls need pillars to be created. In layman’s terms, it’s a frame or skeleton that keeps the roof in place. Find out where all of these joists are. When you’ve found them all and created a visual map, carefully identify where the metal furring system will be attached. This saves time and ensures that objects are placed correctly without being messed up. Because the metal furring is secured to the ceiling joists with screws, it’s crucial to get it right the first time.
Begin by gluing the metal furring strips together at both ends and against each other.
It’s now time to install the metal furring in the appropriate places. Assemble the “net” system while keeping the tiles in mind. Every tile’s flanges should be completely aligned with the tile’s side. To simply verify this, place a tile against the furring to be installed from time to time to ensure it’s being done correctly.
Begin leveling all of the strips in place and securing them as needed.
Because ceilings aren’t always level, use a leveling tool to ensure the furring is level. If a difficulty appears, a wooden shim can be hammered into it to quickly resolve the issue.
CITATIONS:
- “Learn How to Install Furring Strips for Metal Ceilings.” Metal Ceiling Express Blog, 4 Mar. 2016, www.metalceilingexpress.com/blog/learn-how-to-install-furring-strips-for-metal-ceilings/. Accessed 20 Oct. 2021.
- “Metal Furring: Applying a Suitable Ceiling Frame in Any Kind of Building.” Union Galva Steel, 30 Oct. 2020, www.UGC.ph/blog/metal-furring-applying-a-suitable-ceiling-frame-in-any-kind-of-building/. Accessed 20 Oct. 2021.
- “The Importance of Metal Furrings in Building a Strong Foundation.” Union Galva Steel, 16 Mar. 2021, www.ugc.ph/news/importance-of-metal-furrings/. Accessed 20 Oct. 2021.
![]()


 Facebook
 Instagram
 Linkedin
 Twitter
 Youtube